| Example |
 |
| Calculators |
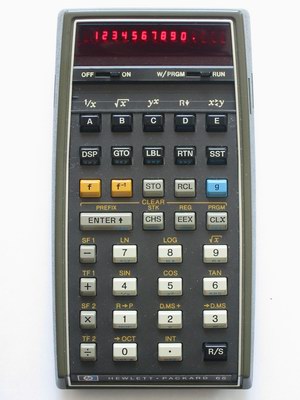
HP-35, HP-45, HP-55, HP-65, HP-67, HP-70, HP-80 |
| Display |
13 digit 7 segment red LED plus sign |
| Keys |
35 |
| Dimensions |
Length 15.1cm, Width 8cm, Height 3.6cm |
| Special |
Some models equipped with a magnetic card reader |
| Shortcomings |
It is hard to make a power supply from a a regular
off-the-shelf converter |
| Batteries |
 |
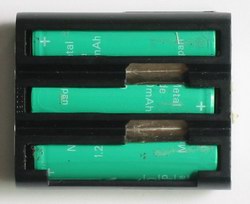
- 3x AA battery pack equipped with 1.5V rechargeable
or normal batteries.
- It is possible to cut open the pack in various ways
to be able to
insert new rechargeables or to insert regular AA batteries.
|
|
| External supply |
 |
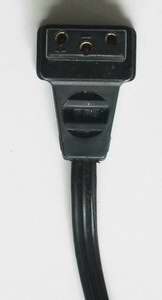
- Special AC power supply with three contacts and two
separate feeds
for battery charging and calculator.
- Part numbers: 00035-60008, 03502A, 82001A/B,
82002A/B/C, 82010A (120/240 VAC), 82022A(240 VAC), 82011A (240 VAC)
- Charger output: 3.6-4.7V DC 200mA for the calulator,
4.2V DC 60mA
for the battery charger (approximate values).
- The two outer contacts (see picture below) are the
plus poles and
feed the calculator and the rechargeable batteries. The center contact
is
ground. When the charger plug is inserted a spring is dislocated which
usually connects the two outer contacts so that the batteries feed the
calculator.
- Note: Do only
connect the power
supply if you have rechargeable batteries installed!
- Note: Some
models will only work
properly with the power supply if a battery pack is installed (ie.
HP-65).
In this case rechargeable batteries MUST be used!!
|
|
| How to open |
 |
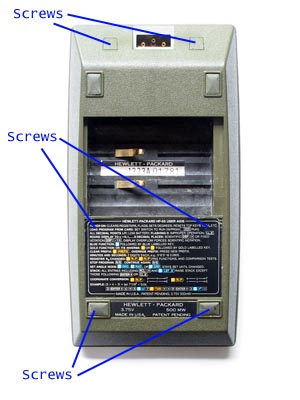
6 screws are to be removed as shown in the picture
below.
- Use a sharp cutter knife to pry out the plastic
covers of the top two
screws.
- Use the same cutter knife to cut underneath the top
ears of the back
label. Then bend up the ears to get to the screw holes. Alternatively,
using
the cutter knife you can cut two round holes into the back label to get
to the screws. This will undoubtedly ruin the back label - but bending
up the
ears will ruin it as well...
- To get to the lower two screws DO NOT rip out the
plastic feet! Rather, lift them gently on the outer side without
removing them entirely.
- Once those 6 screws have been removed the back can
easily be taken
off.
|
|